Rudolph Cheeseboard: Make me in 6 easy steps!
You’ll need
Indulgent Castello® Cheeses
- Tickler™ Extra Mature Cheddar (5 packages)
- Cracked Black Pepper Cheddar
- Aged Havarti
- Brie
- Danish Blue
- Crumbled Danish Blue
- Extra Creamy Brie
- Danish Fontina
Grocery
- Kale leaves
- Broccoli florets
- Roasted red pepper (for Rudolph’s collar)
- Cherry tomato (for Rudolph’s nose)
- Cauliflower florets
- Green grapes
- Crostinis or crackers
- Caper berries (or green olives)
- Gherkins (or pickles)
- Blueberries
- Blackberries
- Raw almonds (for Rudolph’s horns/antlers)
- Honey
- Crushed candied pecans (for Rudolph’s fur)
Equipment
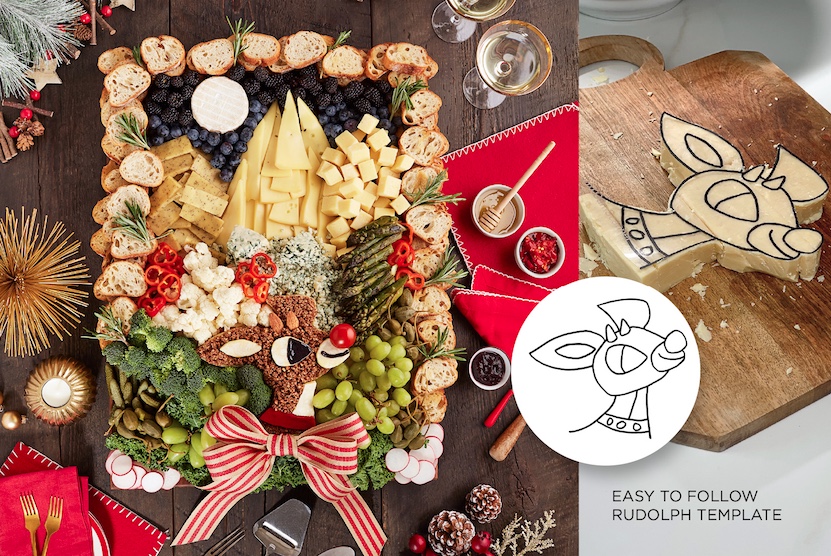
- Print or trace, and then cut out the Rudolph template. Click here for Rudolph template.
Tip: Your Rudolph template should be approximately 6.25” H x 7” W
- Large rectangular cheeseboard 18” x 24”
- 8” round platter (or relatively flat round plate)
- Scissors
- Toothpick (to attach cherry tomato to Rudolph’s nose)
- Broad festive ribbon (to make a bow)
- Paring knife
- Pastry brush
- Black gel icing
- Cooling rack
Make ahead tips:
- Prep all your vegetables and fruit.
- Refrigerate all cheese for at least 1 hour to make it easier to: cut Cheddar into the shape of Rudolph’s face, slice Fontina into thin triangles, break apart pieces of Danish Blue, slice Black Pepper Cheddar into thin rectangular slices, cut Aged Havarti into 1” cubes, and wrap and refrigerate everything until ready to assemble.
Step 1
Print or trace, and then cut out the Rudolph template. Click here for Rudolph template.
Tip: Your Rudolph template should be approximately 6.25” H x 7” W.
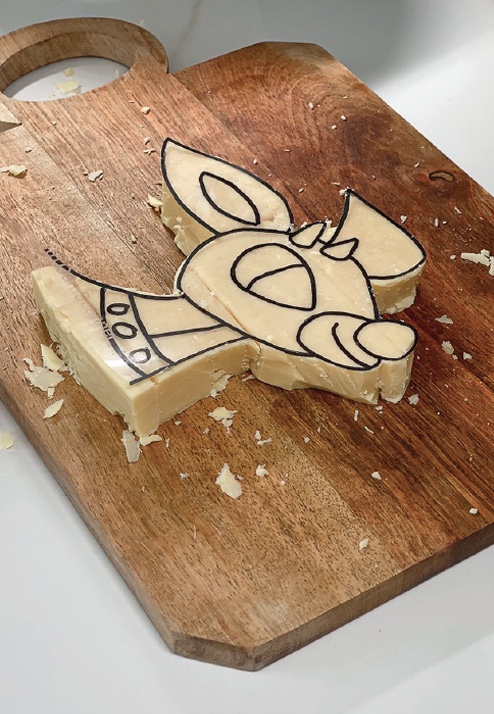
Position blocks of Tickler™ together to form a square that fits the shape of the Rudolph template. With a sharp knife cut around the edges to complete the shape of the head. At this point in time, feel free to eat any of the little leftover bits of Cheddar.
Step 2
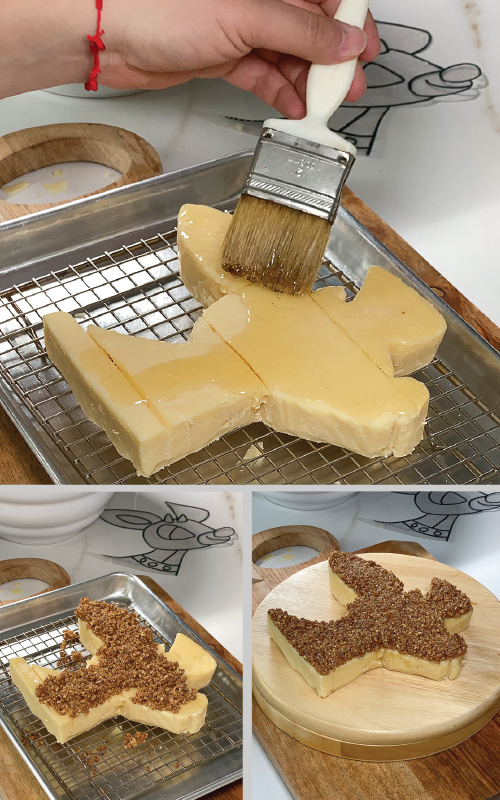
Place cheese on a cooling rack and brush with honey. Sprinkle candies pecan pieces over top of the honey and gently press to adhere, then carefully transfer Rudolph’s head to a round platter.
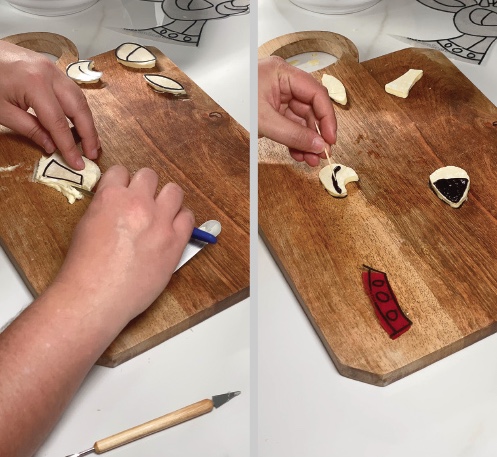
Step 3
Slice three thin pieces of COLD brie rind. Using your stencil cut each one into the shape of Rudolph’s eye, ear, and mouth. Use black icing gel to add the final touches to the eye and mouth. Cut a strip of roasted red pepper for the collar.
Now get ready to make some cheese magic!
Remove all of your prepared cheeses, fruits and vegetables from the refrigerator and begin building.
Remember, here’s where you can have fun in placing fruits and veggies to create a delicious landscape around Rudolph.
Step 4
Place 8” round platter with Rudolph on to the large cheeseboard. Starting with the Fontina slices, overlap them to create a centre point. Randomly place slices of Black Pepper Cheddar and Havarti cubes to the left and right of the Fontina.
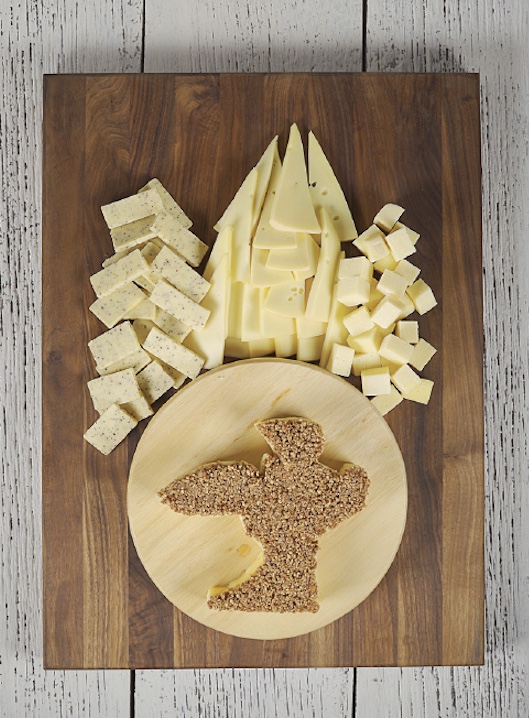
Step 5
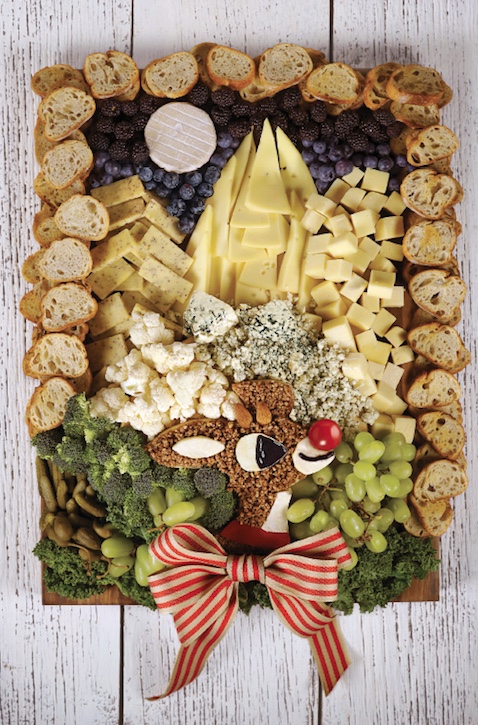
Using this photograph for placement of ingredients. Add the Brie moon, remaining cheeses, fruits and vegetables accordingly, leaving a slight border of free space around the cheeseboard to frame with crostini or crackers.

Step 6
Carefully place decorated eye, mouth and inside of the ear on top of the pecan crumb layer using a spatula. Then place the collar, add a couple of almonds as the antlers and finish with a cherry tomato (on a toothpick) for Rudolph’s nose. Complete your cheeseboard with a beautiful holiday bow and enjoy!